Settings
Platform Settings: Customizing Your ReadyChatAI Environment
The "Settings" area is your control panel for configuring fundamental aspects of your ReadyChatAI account and how it represents your business. This includes your core business details, personal user settings, team management, billing information, and options for accessing the platform.
Business Info
The "Business Info" section is crucial as it holds the foundational details about your company. This information is often used by your ReadyChatAI bot to answer customer questions about your business, populate contact details, and ensure accurate representation across communications.
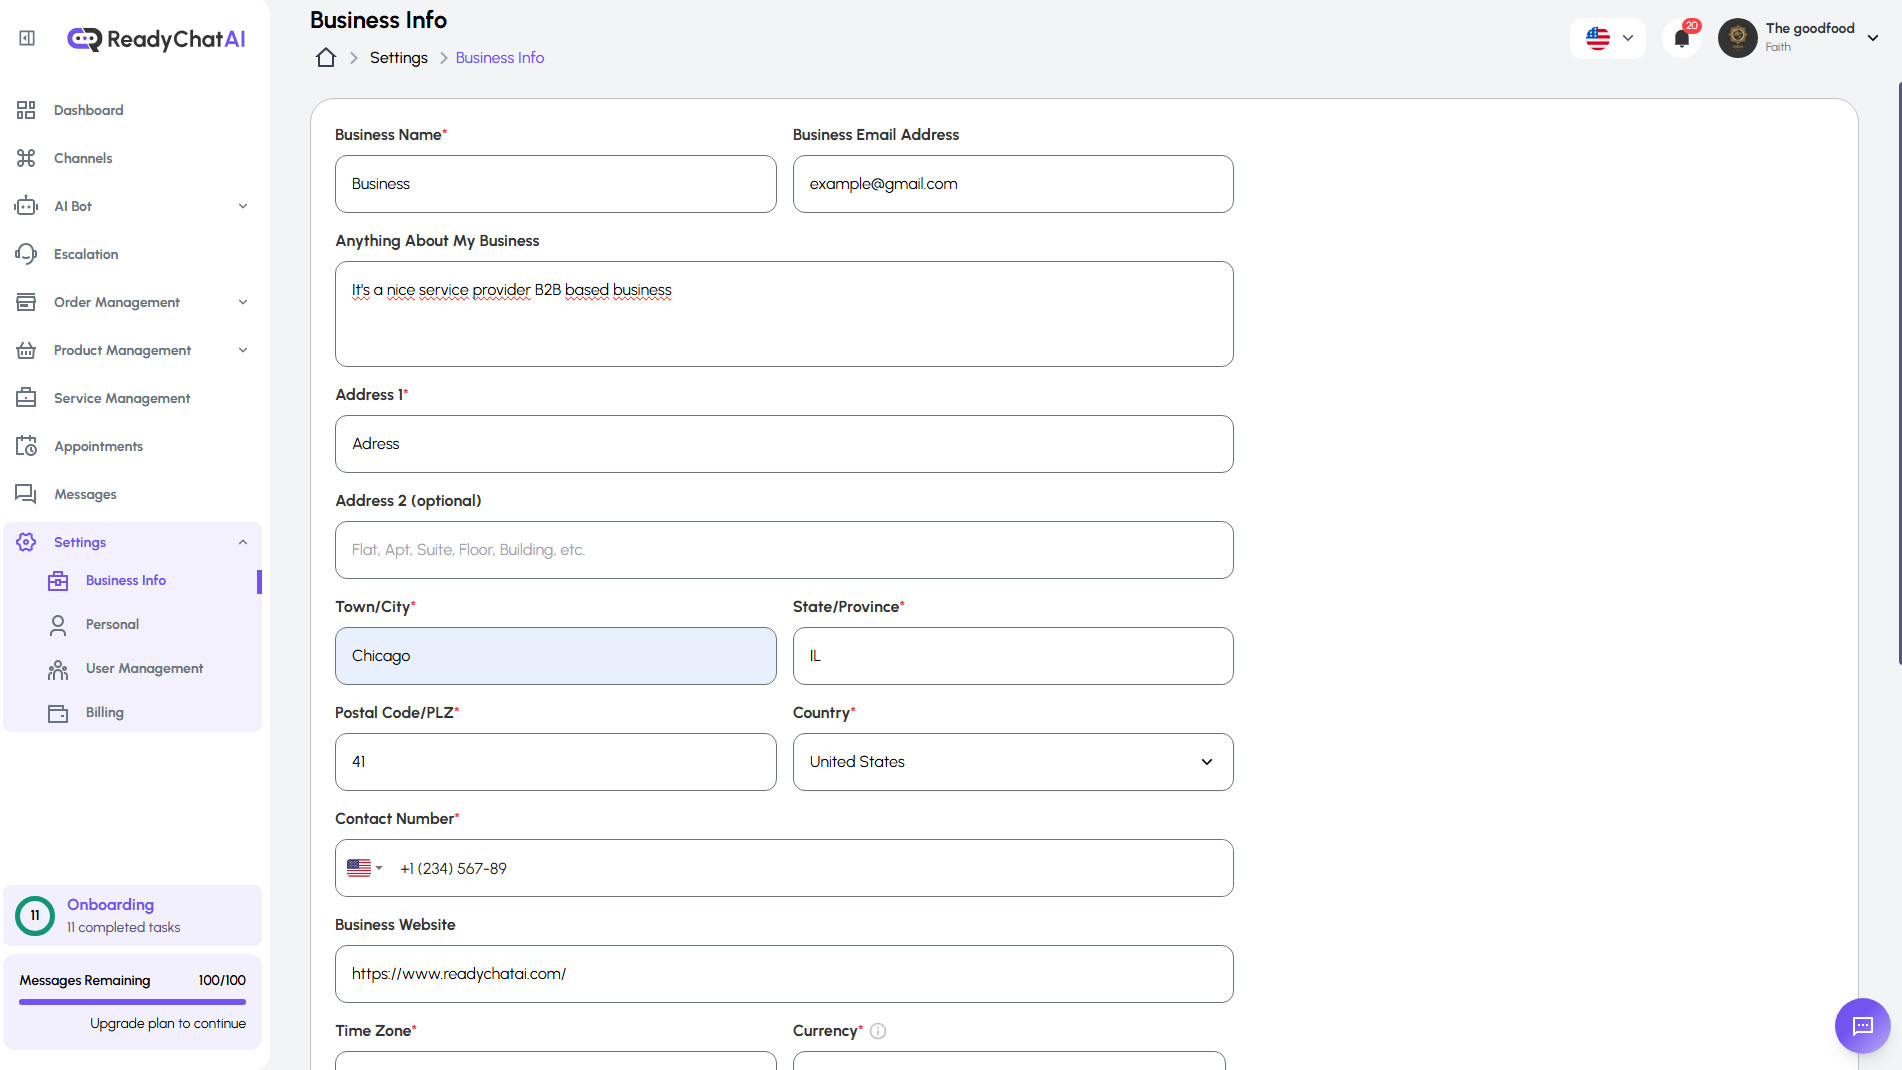 Updating your core business information.
Here, you can review and update the following key details:
- Business Name: The official registered name of your business (e.g., "ReadyBusiness"). This is how your company will be identified.
- Business Email Address: The primary email contact for your business (e.g., "retinga@gmail.com"). This might be used for official communications or displayed to customers.
- Anything About My Business: A free-text field where you can provide a concise description or key details about your business. This information is vital for the AI to understand your company's nature, services, or unique selling propositions. Example: "It's a nice service provider B2B based business." Be as descriptive and informative as possible here.
- Business Address: The physical address of your business, if applicable. This helps with location-based queries.
- Contact Number: Your primary business phone number, including the country code (e.g., +1 (092) 344-4444). This is essential for customers wishing to call you.
- Business Website: The official URL of your company's website (e.g., "N/A" if not applicable, or your actual website address). Your AI bot can direct users here for more information.
Ensure all information in this section is accurate and kept up-to-date, as it directly impacts the quality of information your AI bot can provide. A "Save" or "Update" button (not explicitly visible but implied) would be used to apply any changes.
Other Settings Overview
The "Settings" main menu in the sidebar provides access to several other important configuration areas for your ReadyChatAI account:
 Sub-options available under Settings.
Personal Settings
The Personal Settings section allows you to manage your individual user profile within ReadyChatAI. This area provides comprehensive control over your account.
Account Information
Manage your core account details:
Profile Picture:
- Upload or change your profile photo
- Displayed in team views and chat interactions
- Helps team members identify you
Personal Details:
- First Name - Your given name
- Last Name - Your surname
- Email - Your login email (may require verification to change)
- Phone Number - Contact number for account recovery
Regional Settings:
- Timezone - Set your local timezone for accurate scheduling
- Language - Choose your preferred interface language
Online Status:
- Show Online - Toggle whether your online status is visible to team members
Change Password
Secure your account by updating your password:
- Enter your Current Password
- Enter your New Password
- Confirm New Password
- Click Save to update
Password Requirements:
- Minimum 8 characters
- Mix of uppercase and lowercase letters recommended
- Include numbers and special characters for security
Notification Preferences
Control which notifications you receive:
| Notification Type | Description |
|---|---|
| Order Notifications | Alerts when new orders are placed |
| Question Notifications | Alerts when customers ask unanswered questions |
| Token Expiration Notifications | Alerts when social media tokens need renewal |
Toggle each notification type on or off based on your preferences.
Active Devices
Monitor and manage devices logged into your account:
Device Information Displayed:
- Device type (Desktop, Mobile, Tablet)
- Operating System
- Browser information
- IP Address
- Location (City, Region, Country)
- Last access date
- Session expiration
Security Features:
- View all active sessions
- Identify unfamiliar devices
- Log out remotely from specific devices
- Monitor login activity
Security Tip: Regularly review active devices and log out any sessions you don't recognize to protect your account.
Promo Codes
Apply promotional codes to your account:
- Enter your promo code in the field
- Click Apply
- Discount or benefit is automatically applied
Promo codes may provide:
- Subscription discounts
- Extended trial periods
- Additional features
- Message credits
User Management
The User Management section provides comprehensive tools for managing your team within ReadyChatAI. This includes team scheduling and performance tracking capabilities.
Users Table
View all team members at a glance:
| Column | Description |
|---|---|
| Name | User's full name |
| Login email | |
| Role | Assigned role (Admin, Agent, etc.) |
| Status | Active or Inactive |
| Last Active | Most recent login |
| Actions | Edit, Deactivate, Delete |
Filtering and Search:
- Search by name or email
- Filter by role
- Filter by status (Active/Inactive)
Adding a New User
Create accounts for team members:
- Click "Add User"
- Fill in required information:
Personal Details:
- First Name
- Last Name
- Email Address
- Phone Number
- Username
- Password (temporary)
Role Assignment:
- Select appropriate role from dropdown
- Roles determine access permissions
Language & Regional:
- Preferred language
- Timezone
Editing User Details
Update existing user information:
- Click Edit on the user row
- Modify any details as needed
- Click Save Changes
Editable Fields:
- All personal details
- Role assignment
- Active/Inactive status
- Schedule and availability
User Schedule & Availability
Configure when team members are available for escalations and assignments:
Weekly Hours Calendar:
- Visual calendar showing availability
- Calendar View - See the full week at a glance
- List View - Detailed breakdown by day
Setting Availability:
- Select the day of the week
- Set start and end times
- Toggle availability on/off for each day
Specific Hours:
- Override regular schedule for specific dates
- Set holiday availability
- Configure temporary schedule changes
Schedule Details:
| Field | Description |
|---|---|
| Day | Day of the week |
| Available | Toggle on/off |
| Start Time | Beginning of shift |
| End Time | End of shift |
| Break Times | Optional break periods |
User Roles and Permissions
Different roles have different access levels:
Administrator:
- Full access to all settings
- Can manage other users
- Access to billing and account settings
- All features available
Agent:
- Can handle conversations
- Access to messages and escalations
- Limited settings access
- Cannot manage other users
Viewer (if applicable):
- Read-only access to dashboard
- Can view but not respond to messages
- No settings access
Deactivating vs. Deleting Users
Deactivate:
- User cannot log in
- Data and history preserved
- Can be reactivated later
- Use for temporary situations
Delete:
- Permanently removes user
- History may be preserved for records
- Cannot be undone
- Use for permanent departures
Billing
The Billing section allows you to manage your subscription plan, view your payment method, track message usage, and access your invoice history.
Current Plan
The Current Plan section displays your active subscription details and usage statistics.
Plan Information:
Your current plan details include:
- Plan Name: Free, Standard, Pro, or Enterprise
- Monthly Cost: The price you pay per month
- Message Limit: Total AI messages included in your plan
Message Limits by Plan:
| Plan | Message Limit |
|---|---|
| Free | 100 messages/month |
| Standard | 750 messages/month |
| Pro | 2,000 messages/month |
| Enterprise | Custom |
Message Usage Progress:
A visual progress bar shows your current message consumption:
- Track how many messages you've used
- See remaining capacity at a glance
- Monitor usage to avoid exceeding your limit
Payment Method:
Your stored payment method is displayed for reference:
- Card Network: Visa, Mastercard, etc.
- Last 4 Digits: Card identification
- Expiration Date: Card validity
If no payment method is on file, you'll see a prompt to add one when upgrading.
Upgrading Your Plan
Click the "Upgrade Plan" button to explore available subscription options.
Available Plans:
| Plan | Messages | Key Features |
|---|---|---|
| Free | 100/month | Basic chatbot, single channel, email support |
| Standard | 750/month | Multiple channels, priority email, advanced analytics |
| Pro | 2,000/month | Unlimited channels, priority support, custom branding |
| Enterprise | Custom | Dedicated manager, custom integrations, SLA guarantees |
Billing Frequency:
Choose between two billing options:
- Monthly: Pay month-to-month with flexibility
- Annually: Save 15% with annual billing
Checkout Process:
- Select your desired plan
- Choose billing frequency (monthly/annually)
- Click "Upgrade Now" or "Get Started"
- Complete payment through Stripe's secure checkout
- Return to ReadyChatAI with your new plan active
Billing History
The Billing History section provides a complete record of all your past invoices.
Each invoice entry displays:
- Plan Name: The subscription plan for that period
- Billing Period: Start and end dates (MM-DD-YYYY format)
- Amount Billed: Total charge for the period
- Payment Method: Card used for the transaction
Click the "Download" button on any invoice to save or print for your records.
Contact Sales
For Enterprise plans or custom requirements, use the "Need Help?" button or "Contact Sales" form.
When to Contact Sales:
- Considering Enterprise plan
- Need custom integrations
- Require volume discounts
- Have specific compliance requirements
- Want dedicated support
Best Practices
Account Security
- Use strong, unique passwords
- Enable two-factor authentication if available
- Regularly review active devices
- Keep notification preferences updated
Team Management
- Assign appropriate roles based on responsibilities
- Keep user schedules updated
- Deactivate users promptly when they leave
- Document role assignments for clarity
Business Information
- Update business info whenever details change
- Provide comprehensive business descriptions
- Keep contact information current
- Verify all details are accurate for AI responses