Escalations
Taking Over When It Matters: Human-in-the-Loop Escalations
The "Escalations Management" page is the central hub for your human agents to intervene in conversations. When a user asks for a supervisor, expresses significant frustration, or the bot recognizes a query it's not equipped to handle, the conversation is automatically escalated. This feature ensures that customers with complex or sensitive issues receive the personal attention they need from a human agent, seamlessly transitioning from bot to human support.
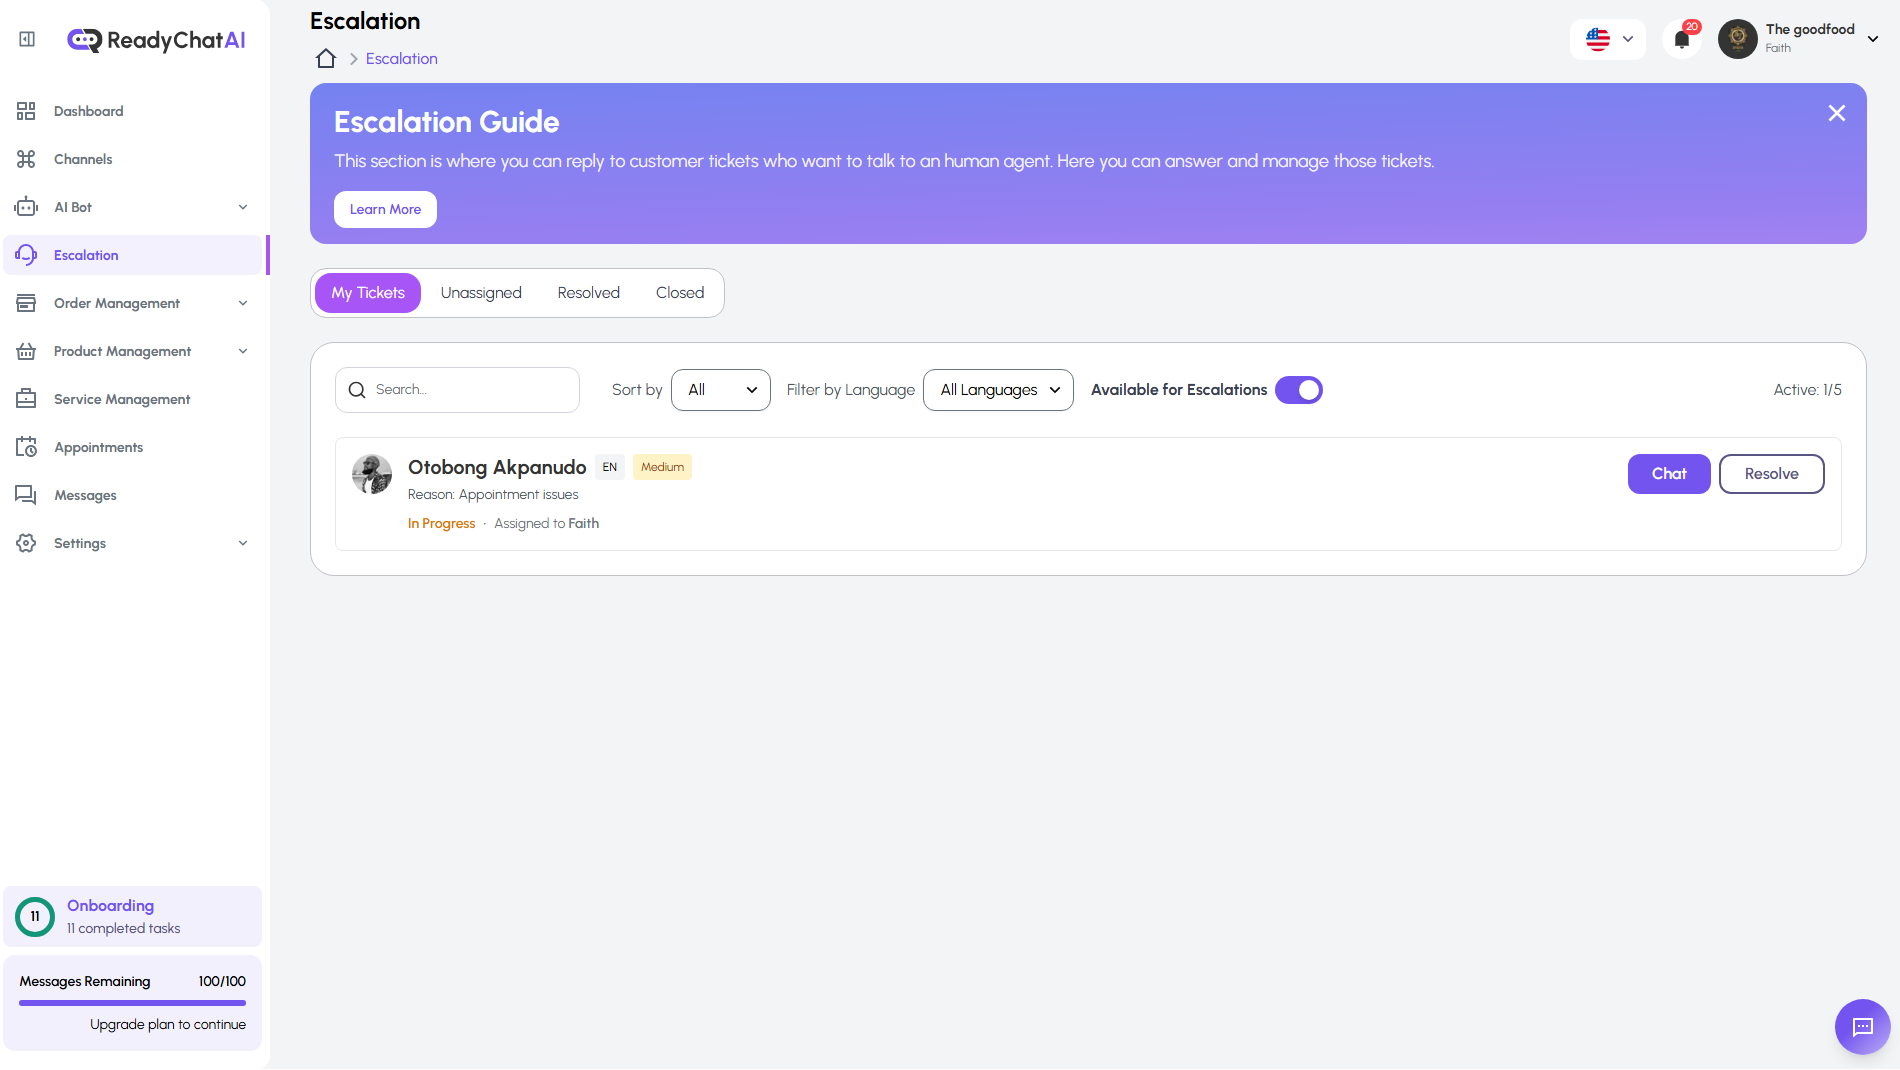 The main dashboard for viewing and managing active escalations
The Escalations Dashboard
This dashboard provides a real-time overview of all conversations that require human attention. It is designed to help agents efficiently manage their workload and respond to customers promptly.
1. Ticket Queues
At the top of the page, you'll find several tabs that organize tickets based on their status, representing the lifecycle of an escalation:
- My Tickets: This is the default view, showing all escalations currently assigned to you.
- Unassigned: This queue contains new escalations that are waiting to be accepted by an agent.
- Resolved: A list of conversations that have been marked as resolved by an agent.
- Closed: Tickets that are fully closed and archived.
2. Filtering and Availability
To help you manage the queue, several tools are available:
- Search: A search bar to quickly find a specific ticket.
- Sort by / Filter by Language: Dropdown menus to organize the tickets by criteria like priority, or customer language.
- Available for Escalations Toggle: This crucial switch controls your status. When toggled on, you are eligible to receive new escalations from the "Unassigned" queue. The "Active (1/5)" indicator shows how many escalations you are currently handling out of your maximum capacity.
3. The Escalation Card
Each card in the queue represents a single escalated conversation and provides key information at a glance:
- Customer Name & Avatar: Identifies the user you will be assisting.
- Tags (e.g., ES, LOW): May indicate the customer's language (ES for Spanish) and the priority of the ticket (Low).
- Reason: A brief summary of why the escalation was triggered (e.g., "cotización de juegos al por mayor" - wholesale games quotation).
- Status: Shows the current state, such as "In Progress - Assigned to [Agent Name]".
- Action Buttons:
- Chat: Opens the detailed chat view to begin interacting with the customer.
- Resolve: Marks the ticket as resolved, moving it out of the active queue.
Handling an Escalation: The Chat View
Clicking the Chat button on an escalation card opens a modal window where the conversation takes place.
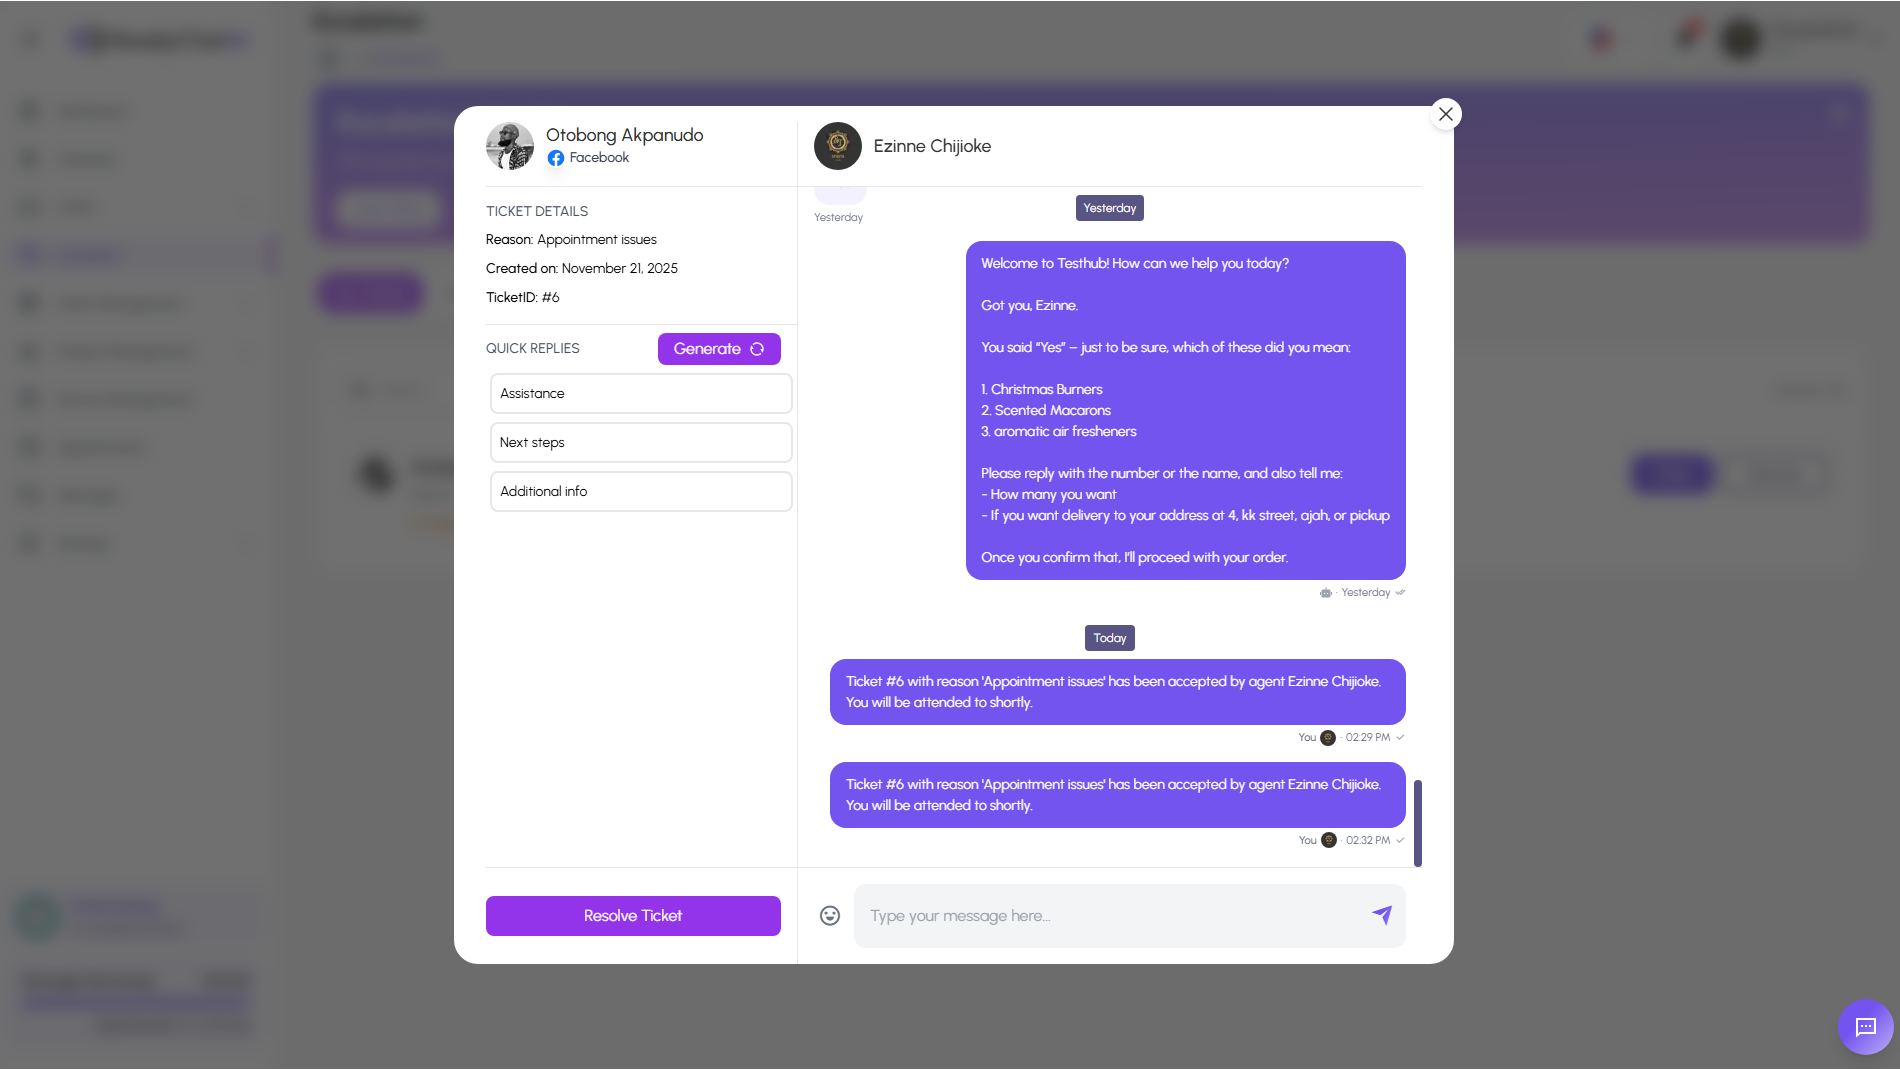 The detailed chat view for interacting with the customer
This interface is split into two main sections: the agent toolkit on the left and the conversation history on the right.
The Left Pane: Ticket & Agent Tools
This area provides context and tools to help you respond effectively.
- Ticket Details: Displays essential information about the escalation, including the customer's name, the platform (e.g., 📘 Facebook), the date the ticket was created, and its unique Ticket ID.
- Quick Replies: Pre-written responses for common scenarios like "Follow up" or "Clarify needs". Clicking one will populate it in the message box. The Generate button can be used to leverage AI for suggesting context-aware replies.
- Resolve Ticket Button: The primary action button to mark the conversation as resolved once the customer's issue has been addressed.
The Right Pane: Conversation Hub
This is where you'll interact directly with the customer.
- Agent Assignment: The top bar confirms which agent (e.g., "John Wilhelm") is handling the conversation.
- Chat History: The full transcript of the conversation is displayed here, including all messages from the customer and the bot leading up to the escalation. Crucially, it also includes system messages (e.g., "El ticket #34... ha sido aceptado por el agente Jose Wilhelm"), which provide an audit trail of actions taken on the ticket.
- Conversation Warnings: Important notices, such as "Meta restrictions apply to this conversation," may be displayed to inform agents of any platform-specific rules or limitations.
- Message Input: At the bottom is the text box where you can type your response, use Quick Replies, or send AI-generated messages.
Best Practices for Handling Escalations
- Accept Tickets Promptly: Keep an eye on the "Unassigned" queue and accept new tickets as your capacity allows to minimize customer wait times.
- Review the Context: Before typing your first message, read the entire chat history to fully understand the customer's issue and why the bot escalated the conversation.
- Leverage Quick Replies: Use Quick Replies and the Generate feature to speed up your workflow, but always personalize the message to the customer's specific situation.
- Communicate Clearly: Introduce yourself so the customer knows they are now talking to a human. Manage expectations and provide clear next steps.
- Confirm Resolution: Before clicking "Resolve Ticket," confirm with the customer that their issue has been fully addressed and they are satisfied with the outcome.
- Manage Your Availability: Remember to toggle off your "Available for Escalations" status if you are going on a break or ending your shift to ensure new escalations are routed to active agents.