Appointments
Managing Appointments
The "Appointments" section is your central hub for viewing, tracking, and managing all appointments scheduled through your ReadyChatAI bot or manually entered into the system. This feature is essential for service-based businesses to stay organized and ensure a smooth experience for their clients.
Path: Communication > Appointments
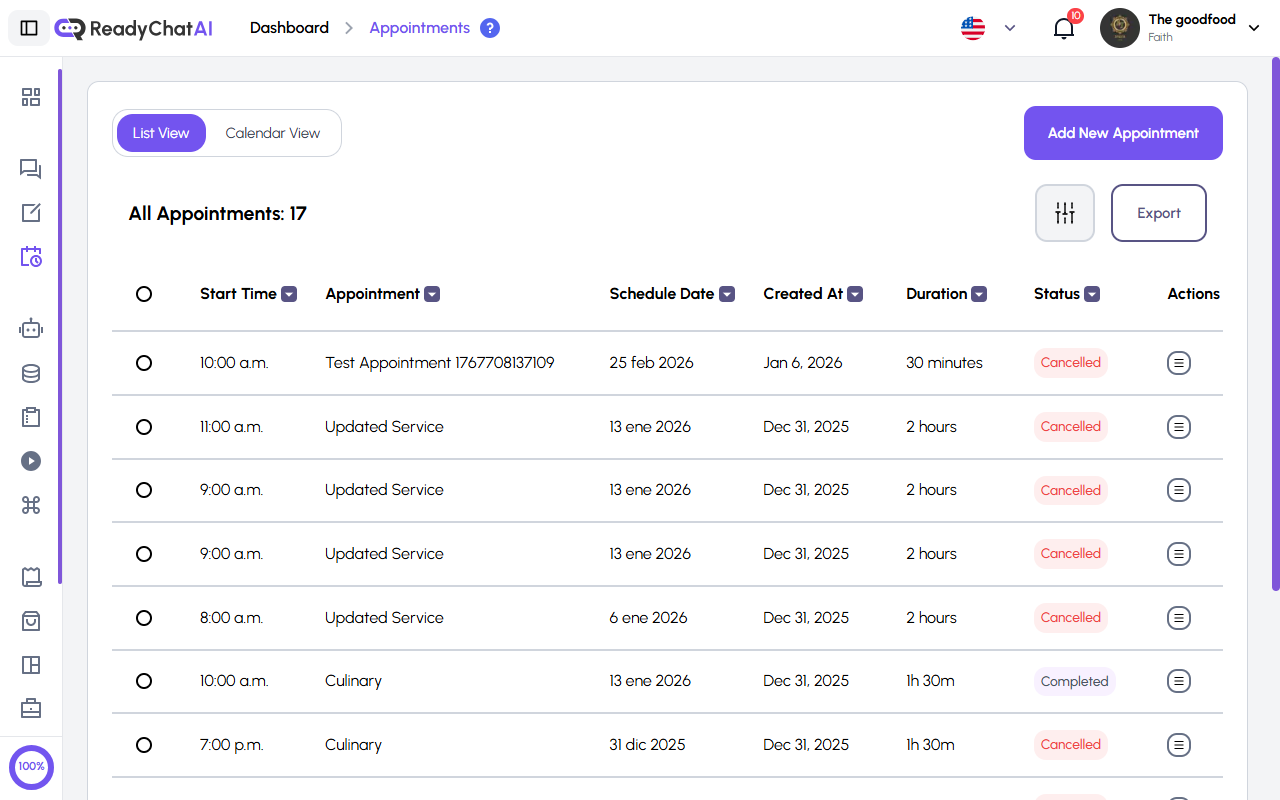 The Appointments page in List View showing all scheduled appointments.
Navigating Appointment Views
ReadyChatAI provides two primary ways to view your appointments:
- List View: (Default) Presents appointments in a tabular format, ideal for quickly scanning details and performing actions.
- Calendar View: Displays appointments visually on a calendar, offering an intuitive way to see your schedule at a glance.
You can switch between views using the "List View" and "Calendar View" toggle tabs at the top of the page.
List View
Appointments Table
The main table shows the total count (e.g., "All Appointments: 63") and displays the following columns:
| Column | Description |
|---|---|
| Start Time | The scheduled start time of the appointment |
| Appointment | The name of the service booked (e.g., "Book a Vehicle Check Appointment", "Ohana") |
| Schedule Date | The date the appointment is scheduled for |
| Created At | When the appointment was originally created |
| Duration | Length of the appointment (e.g., 1 hour, 1h 45m) |
| Status | Current status with color-coded badge (Confirmed, Completed, Cancelled, No-show) |
| Actions | Menu button for managing the appointment |
All columns with a sort icon can be clicked to sort ascending or descending.
Appointment Statuses
| Status | Color | Description |
|---|---|---|
| Confirmed | Green | Appointment is confirmed and upcoming. Click the dropdown arrow to change status. |
| Completed | Gray | Appointment has been completed |
| Cancelled | Red | Appointment was cancelled |
| No-show | — | Client did not attend the appointment |
Management Tools
- Filter — Sort and narrow down appointments by criteria (date range, status, service type)
- Export — Download appointment data as a file for reporting or record-keeping
- Add New Appointment — Manually create a new appointment (button at top right)
Adding a New Appointment
Click the "Add New Appointment" button to manually schedule an appointment. Fill in the required details including service, date, time, and client information, then save.
Calendar View
The Calendar View provides a visual representation of your schedule.
Navigation & Display
- Navigation: Use Today, Back, and Next buttons to navigate through dates
- View Modes: Switch between Month, Week, and Day views
- Appointment Blocks: Scheduled appointments appear as colored blocks within the calendar grid, showing the time and service name. Click on a block to view details.
- Empty Slots: Days or times without appointments appear blank
The Calendar View is particularly useful for identifying busy periods, open slots, and potential scheduling conflicts.
Appointment Details
Click on any appointment (from the Actions menu in List View or by clicking a block in Calendar View) to view full details:
- Client information
- Service booked
- Date, time, and duration
- Current status
- Ability to reschedule, cancel, or update status
Integration with Other Features
- Service Management: Availability and scheduling rules are defined when you create or edit a service. The Appointments page reflects bookings made based on those rules.
- Booking Page: When the "Redirect to Booking Page" feature is enabled in Configure, customers receive a booking link to schedule appointments through an interactive calendar.
- Checkout Questions: Service-specific questions configured in Checkout Questions (Service tab) are asked during the booking process.
Best Practices
- Review daily: Check upcoming appointments at the start of each day
- Update statuses promptly: Mark appointments as completed or no-show to maintain accurate records
- Use Calendar View for planning: Get a visual overview of your week or month
- Export regularly: Download appointment data for business analysis and reporting
- Keep services updated: Ensure your Service Management settings reflect current availability