Configure
Configuring Your AI Bot: Behavior & Personality
The "Configure" section is where you fine-tune the core behavior, personality, and operational settings of your ReadyChatAI bot. These settings determine how your bot interacts with customers and what capabilities it has.
Path: AI Configuration > Configure
 An overview of the AI Bot Configuration settings.
Bot Settings: Crafting Your Bot's Persona
This initial group of settings focuses on how your bot presents itself and communicates.
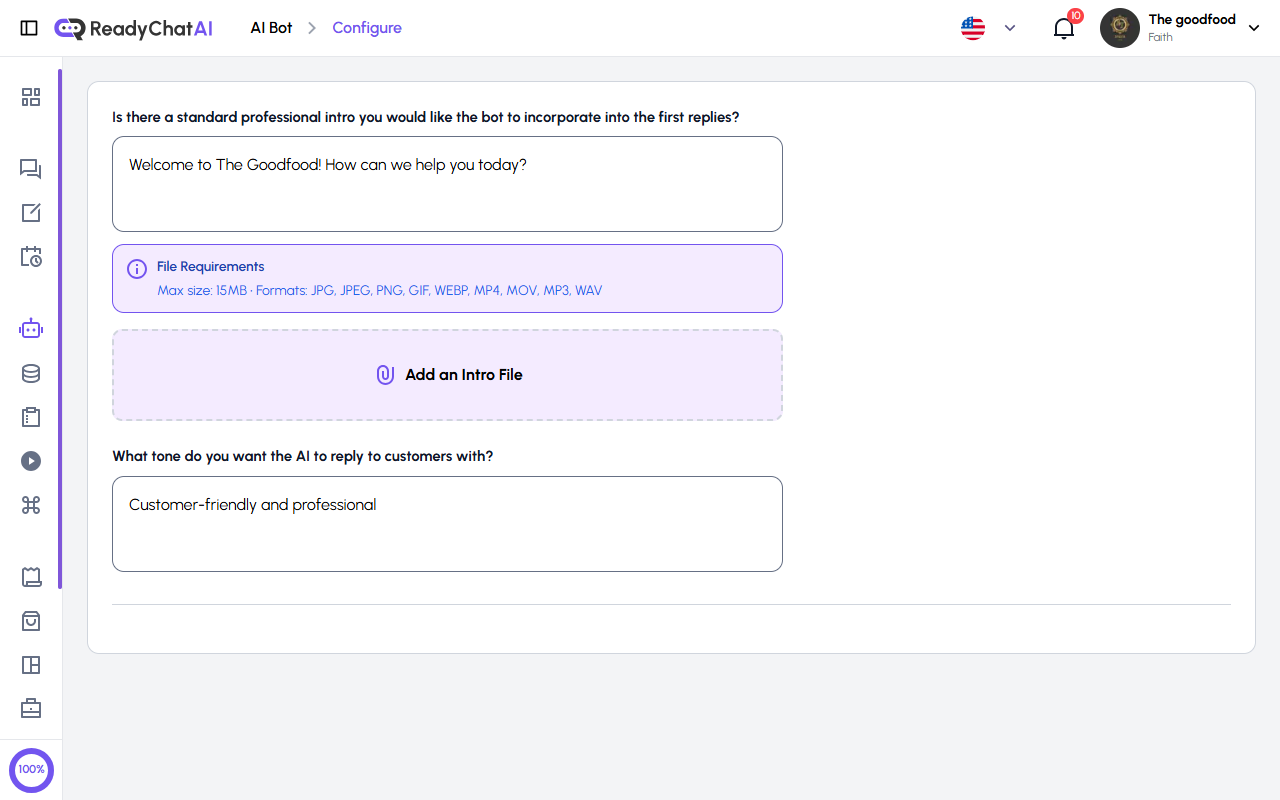 The bot settings form where you configure the intro message and reply tone.
Standard Professional Intro
"Is there a standard professional intro you would like the bot to incorporate into the first replies?"
Define a default introductory message that your bot will use at the beginning of conversations. This helps set the tone and immediately inform users they are interacting with your virtual assistant.
You can also upload files (images, videos, audio) that will always be sent with the introductory message. Click Add an Intro File to attach files. Supported formats include JPG, JPEG, PNG, GIF, WEBP, MP4, MOV, MP3, and WAV (max 15MB).
Example: "Hello! Welcome to [Your Business]! How can I help you today?"
AI Reply Tone
"What tone do you want the AI to reply to customers with?"
This free-text field allows you to describe the personality and communication style of your bot. Write a short description of how you want the AI to interact with customers.
Example: "Be kind and friendly, ready to assist where necessary."
Tip: Be specific about your desired tone. Instead of just "professional," try "Professional but approachable, with a helpful and patient attitude."
General Settings: Feature Cards
Below the bot settings, you'll find feature cards that control specific bot behaviors. Each card includes a live chat preview showing how the setting affects conversations, making it easy to understand the impact before enabling.
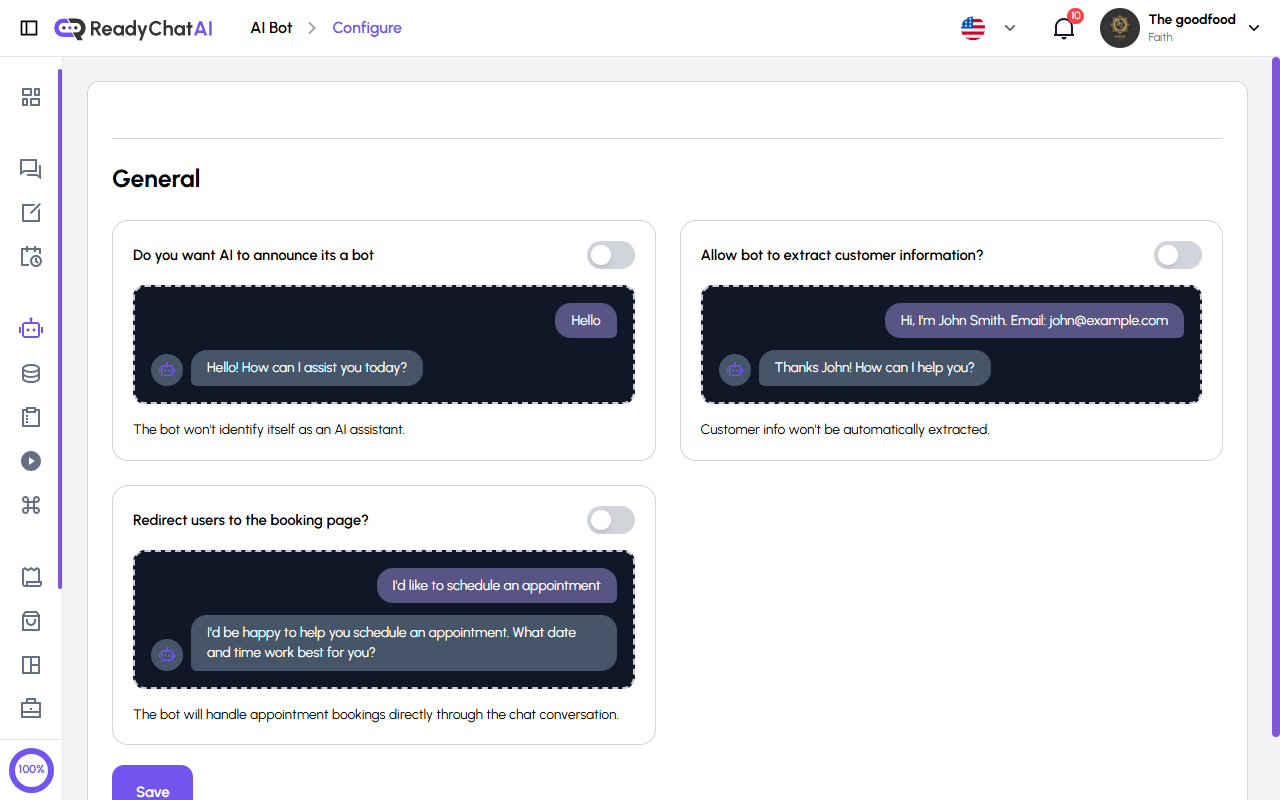 The General section with feature cards for bot behavior configuration.
Announce Bot
"Do you want AI to announce it's a bot?"
Toggle whether your bot identifies itself as an AI assistant in conversations.
- ON: The bot will add "(bot)" to its name in messages, making it clear to customers they are chatting with an AI
- OFF: The bot won't identify itself as an AI assistant
The chat preview shows example conversations with and without the bot announcement.
Auto-Extract Customer Info
"Allow bot to extract customer information?"
Automatically collect and save customer information mentioned during conversations.
- ON: The bot will automatically capture customer details (name, email, phone) from the conversation and save them to the customer's profile
- OFF: Customer info won't be automatically extracted
The preview shows how the bot detects and saves information like names and email addresses from natural conversation, with an "Automatically Extracted Information" summary.
Redirect to Booking Page
"Redirect users to the booking page?"
When enabled, the bot will send customers a direct link to an interactive booking page where they can schedule appointments.
- ON: Customers receive a booking link with a visual calendar interface to choose date, time, and provide details
- OFF: Booking is handled through conversational flow only
The preview shows the booking flow: Choose Time → Details → Confirm.
Note: This feature works with the Service Management section. You need to have services configured for the booking page to work.
Saving Your Configuration
After making your desired changes to any of these settings, click the Save button at the bottom of the page to apply them. Without saving, your adjustments will not take effect.
Experiment and Iterate: The best bot configuration often comes from experimentation. Try different settings, test them in the Playground, and adjust based on performance and user feedback. The "Configure" page is designed for you to easily update these settings as your needs evolve.